It is important to create a smooth customer experience, as it significantly affects the probability of the customers purchasing a product. A website that is clear and easy to navigate will encourage customers to stay and explore more of your site. On the other hand, if your customer finds it hard to find a particular product, it will take them less than a second to leave your store. Therefore, displaying your products in a neat and concise manner can make all the difference in deciding whether or not your customer stays.
Lucky for you Boutir users, you can efficiently categorize your products on your store to 3 different levels for Business and Business PLUS Plan users! This ensures that your customers can find exactly what they are looking for with no trouble.
*For Starter Plan users, you can add 1 level of product classification.
In order to set up these categories, you can do so through both the Boutir app and Boutir’s CMS desktop.
Table of Contents:
- Tutorial for CMS Desktop
- Tutorial for Boutir App
Tutorial for CMS Desktop
- Login to CMS Desktop (https://www.boutir.com/user_cms/log-in)
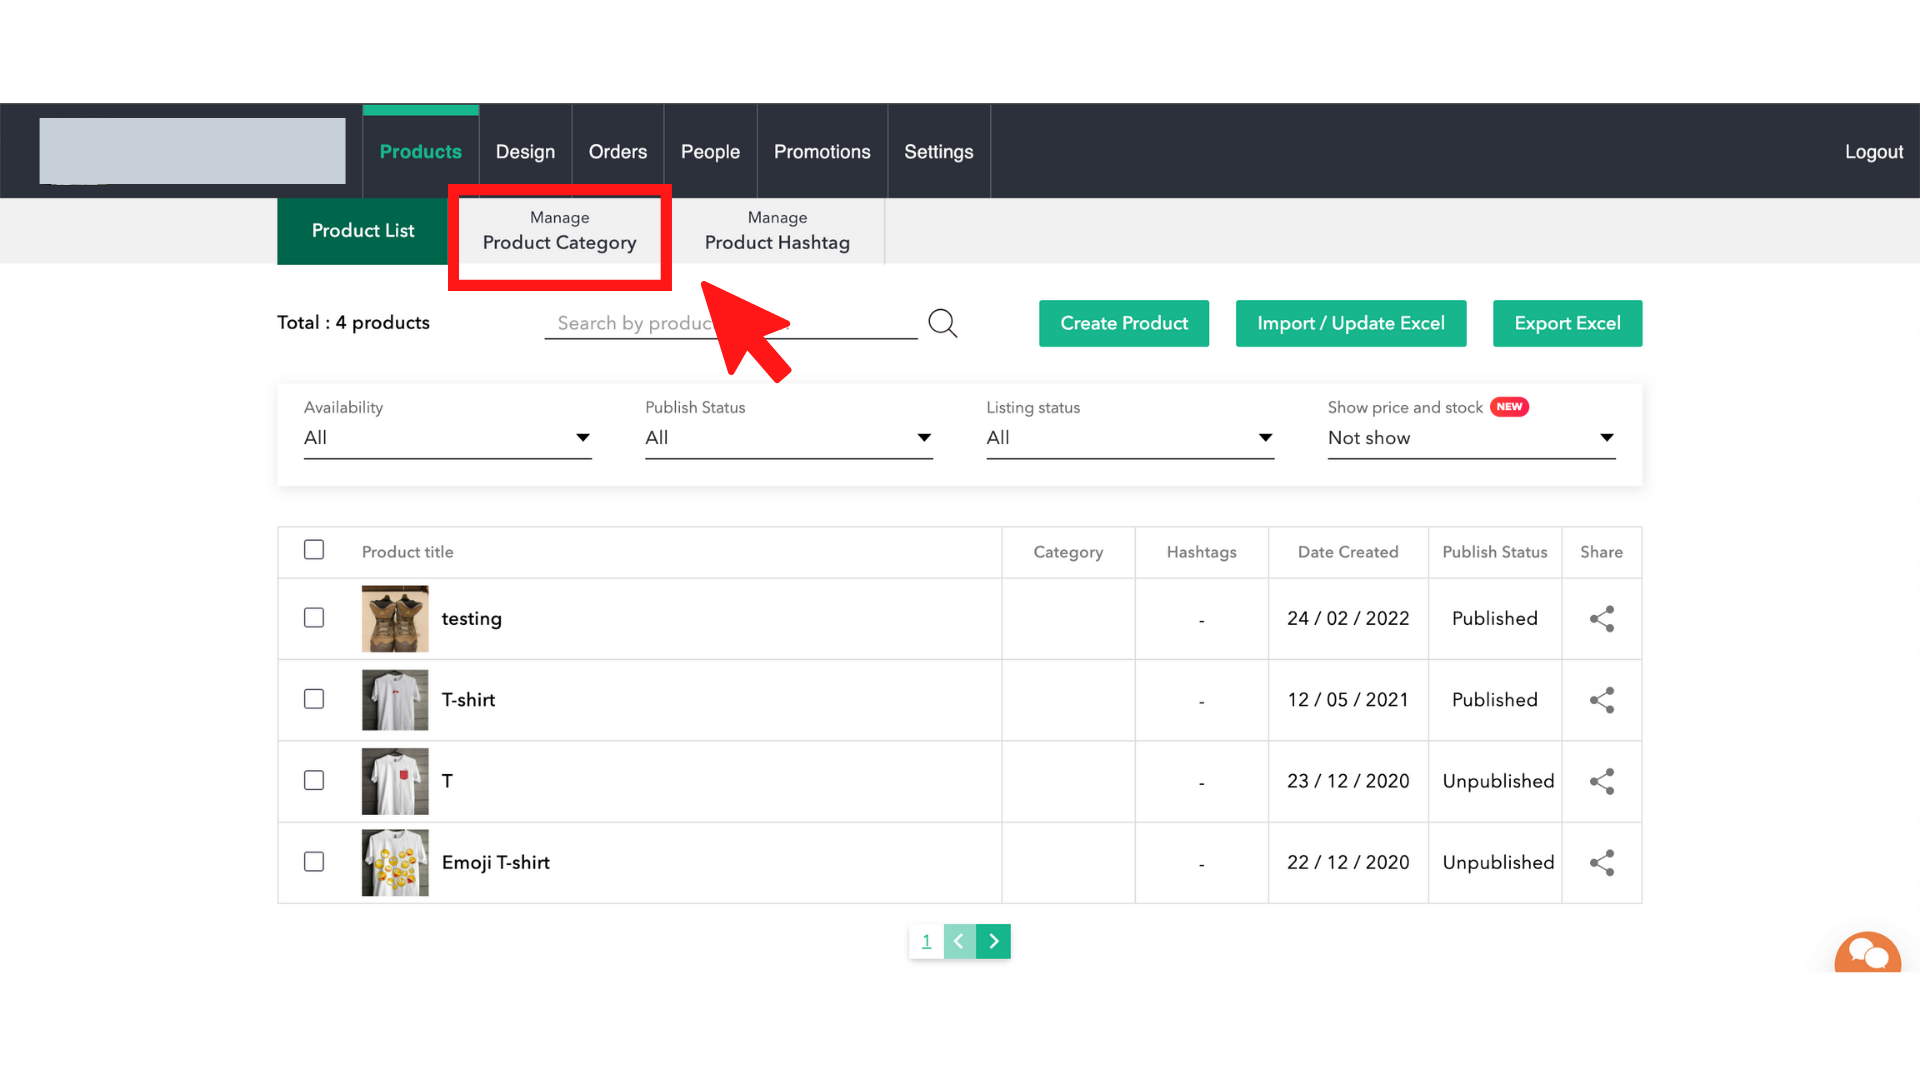
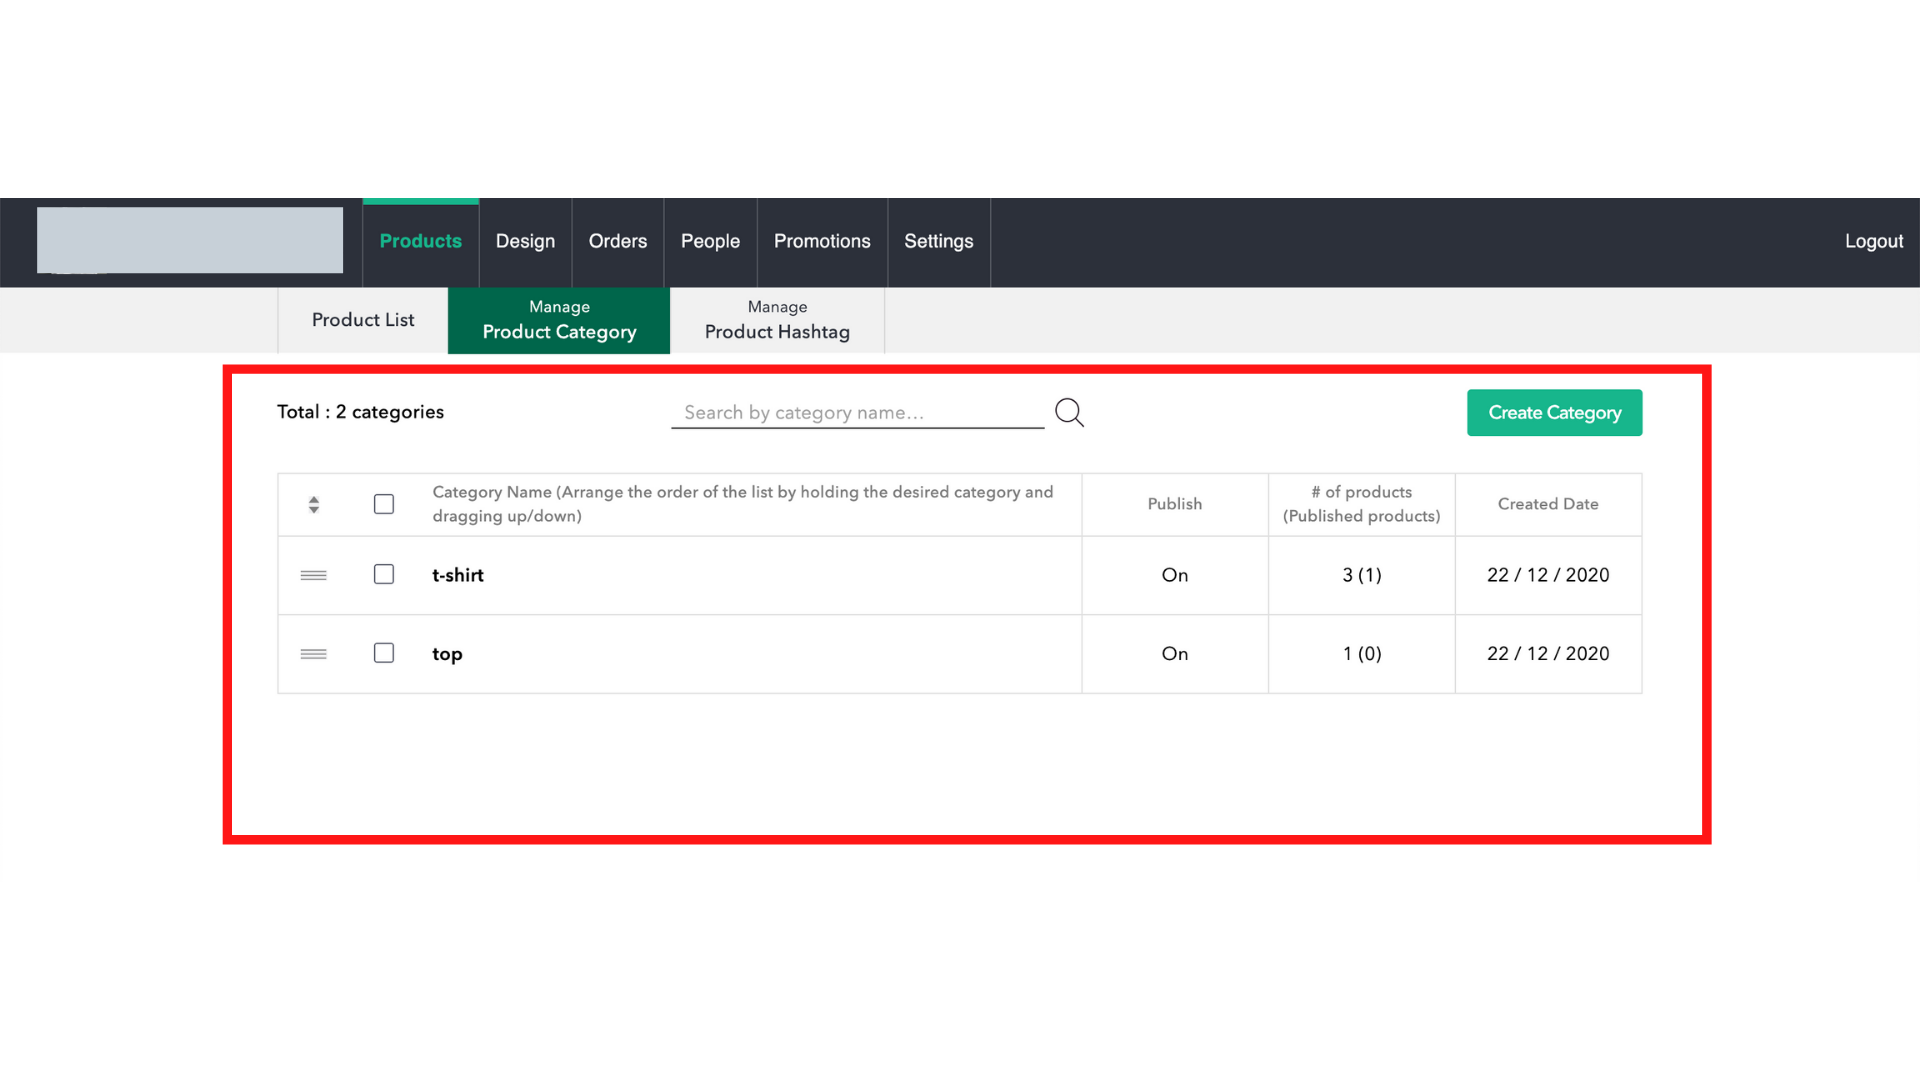
- Once you have logged in, you will be in the Product Tab. Go to “Manage Product Category”.
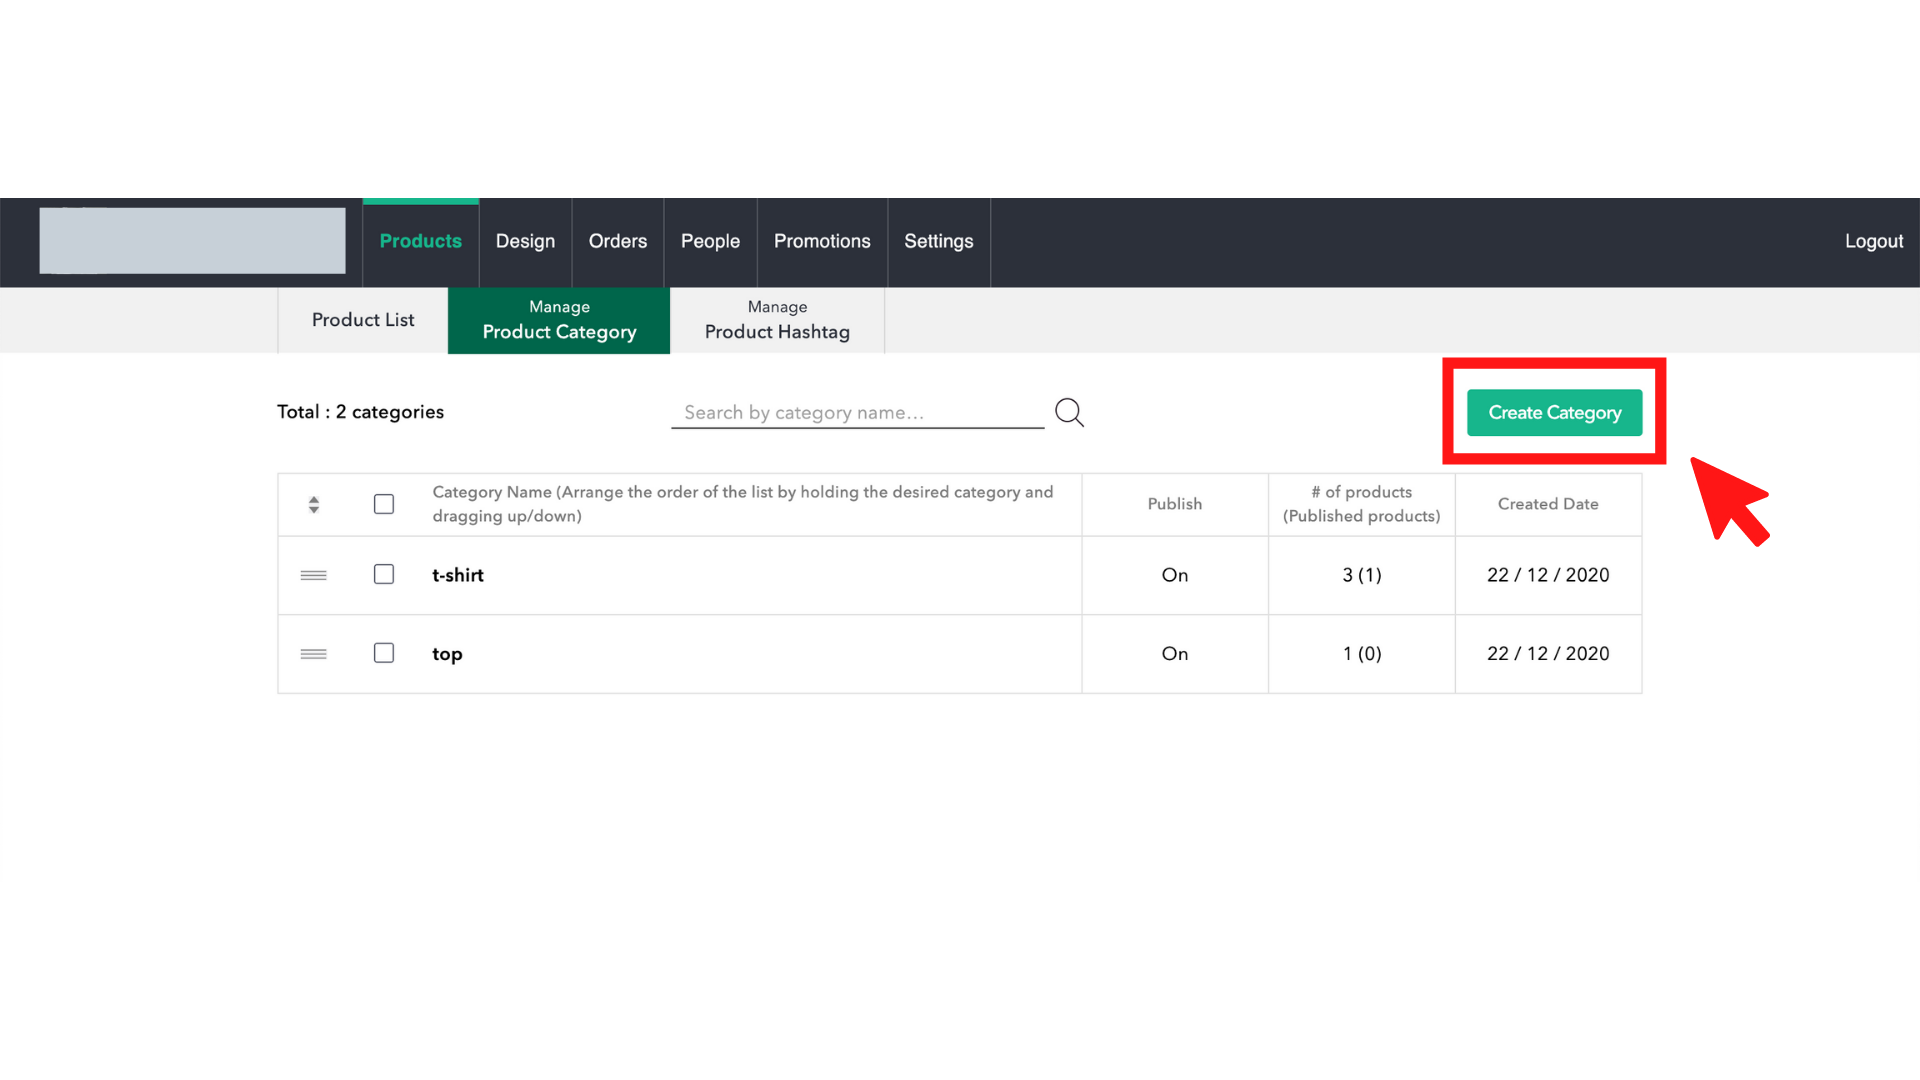
3. On the top right-hand side, click “Create Category”
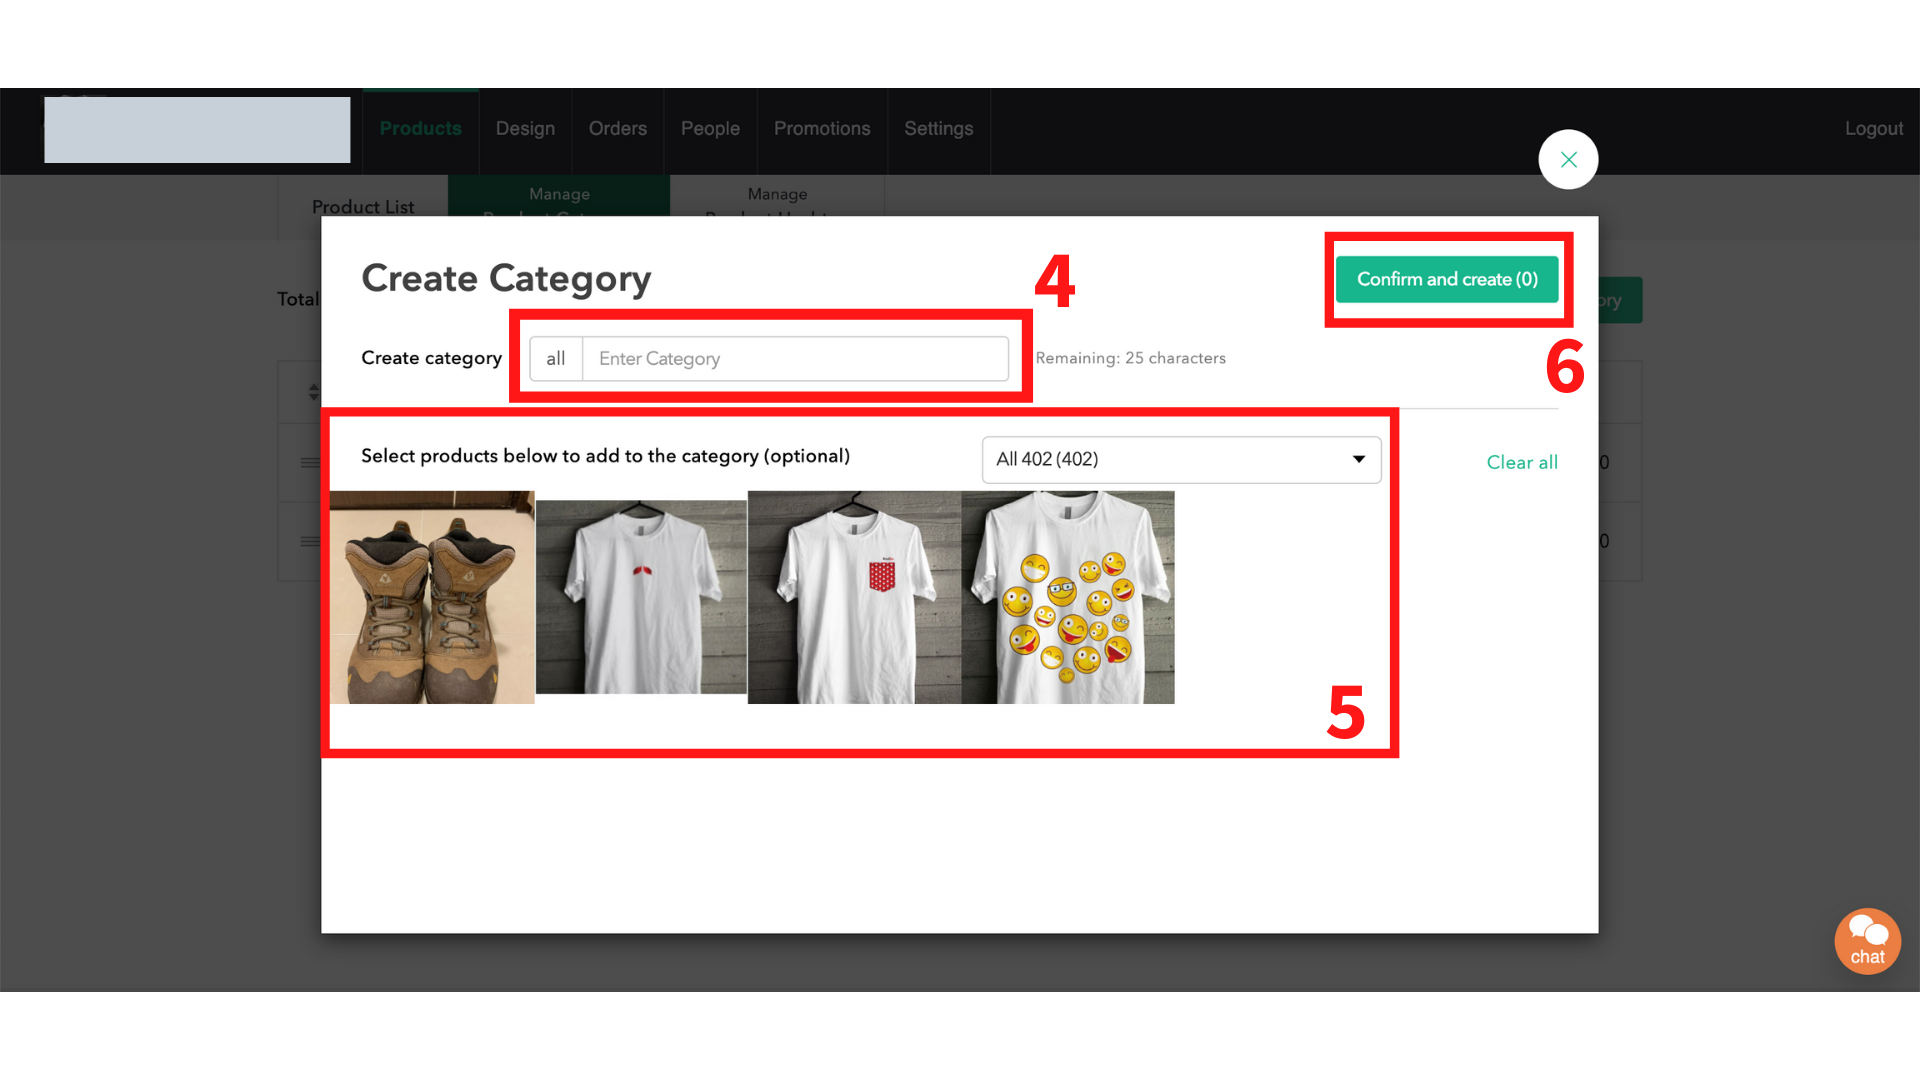
4. Type in the name of the category.
5. (Optional) If you have already uploaded your products, you may also select the products that you want to add under this category.
6. Once you are done, click “Confirm and Create”
7. The categories will then appear on the main page under “Manage Product Category”.
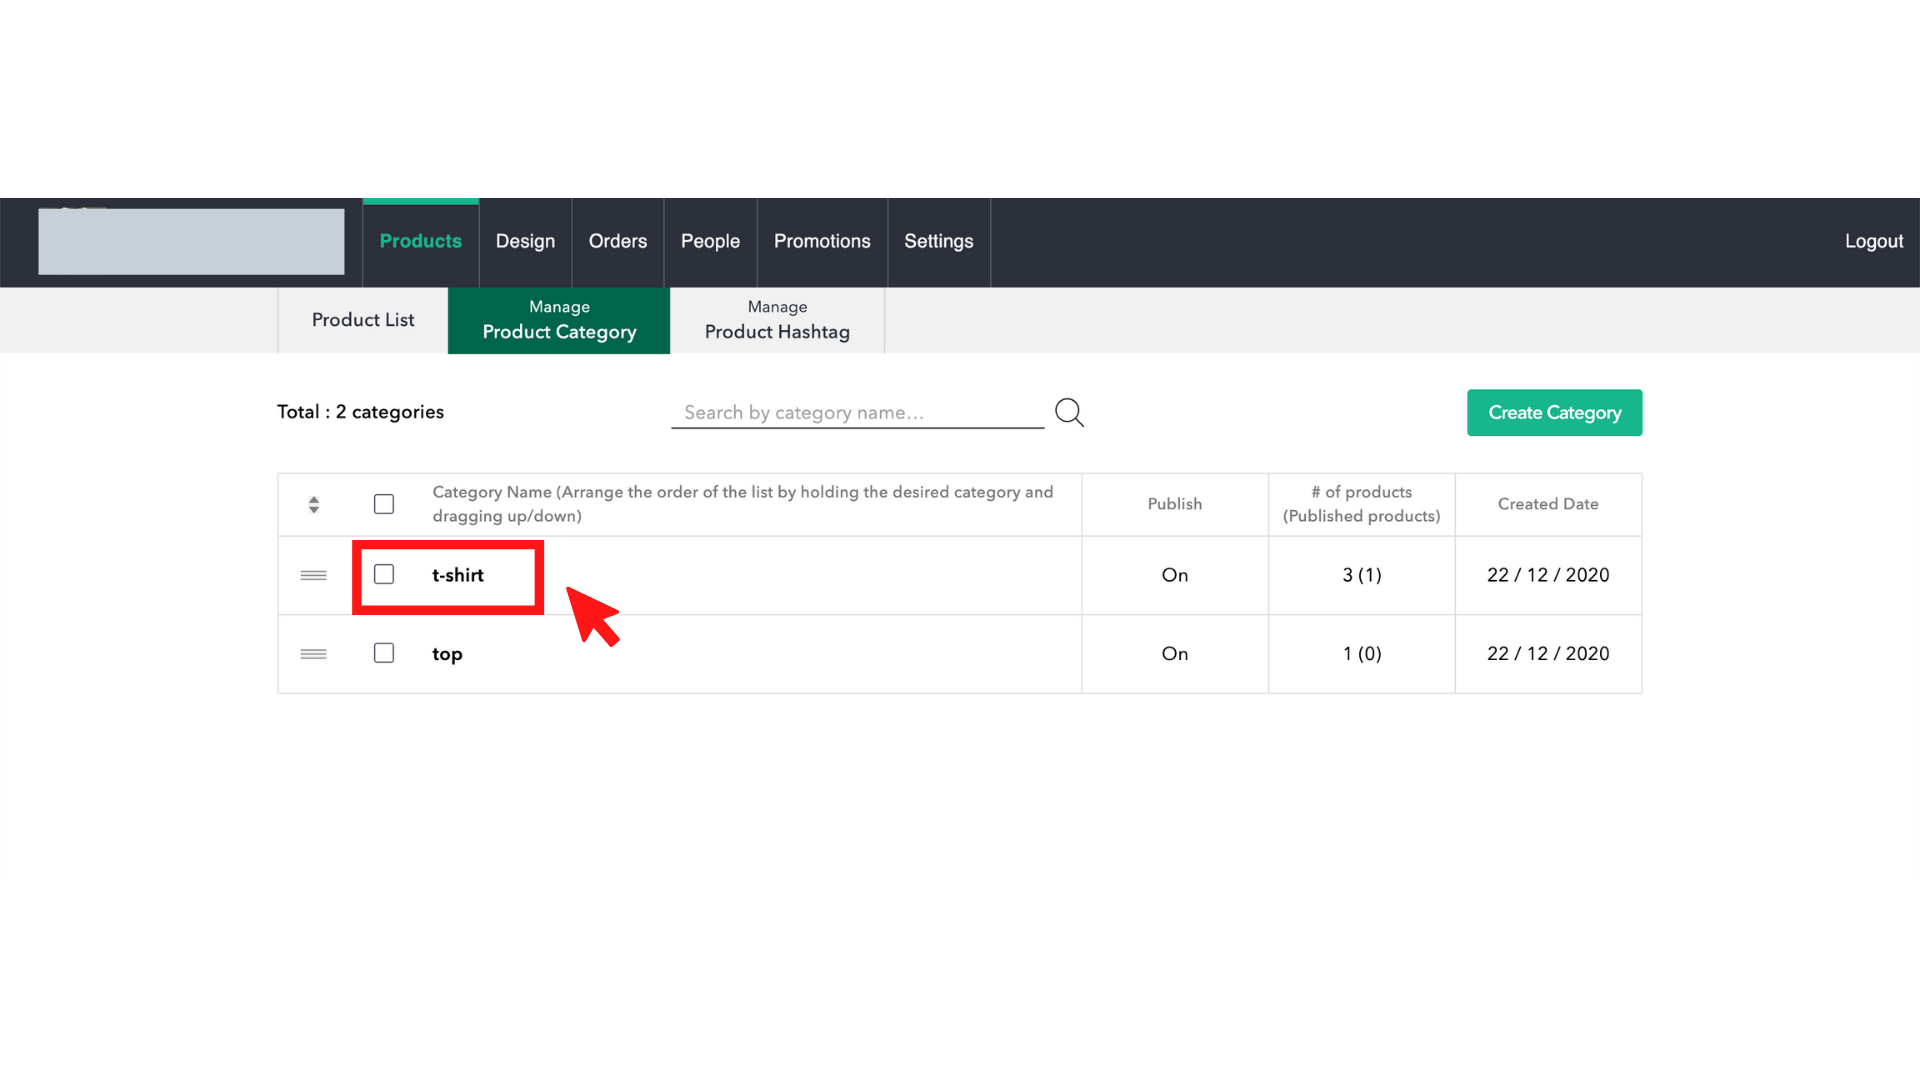
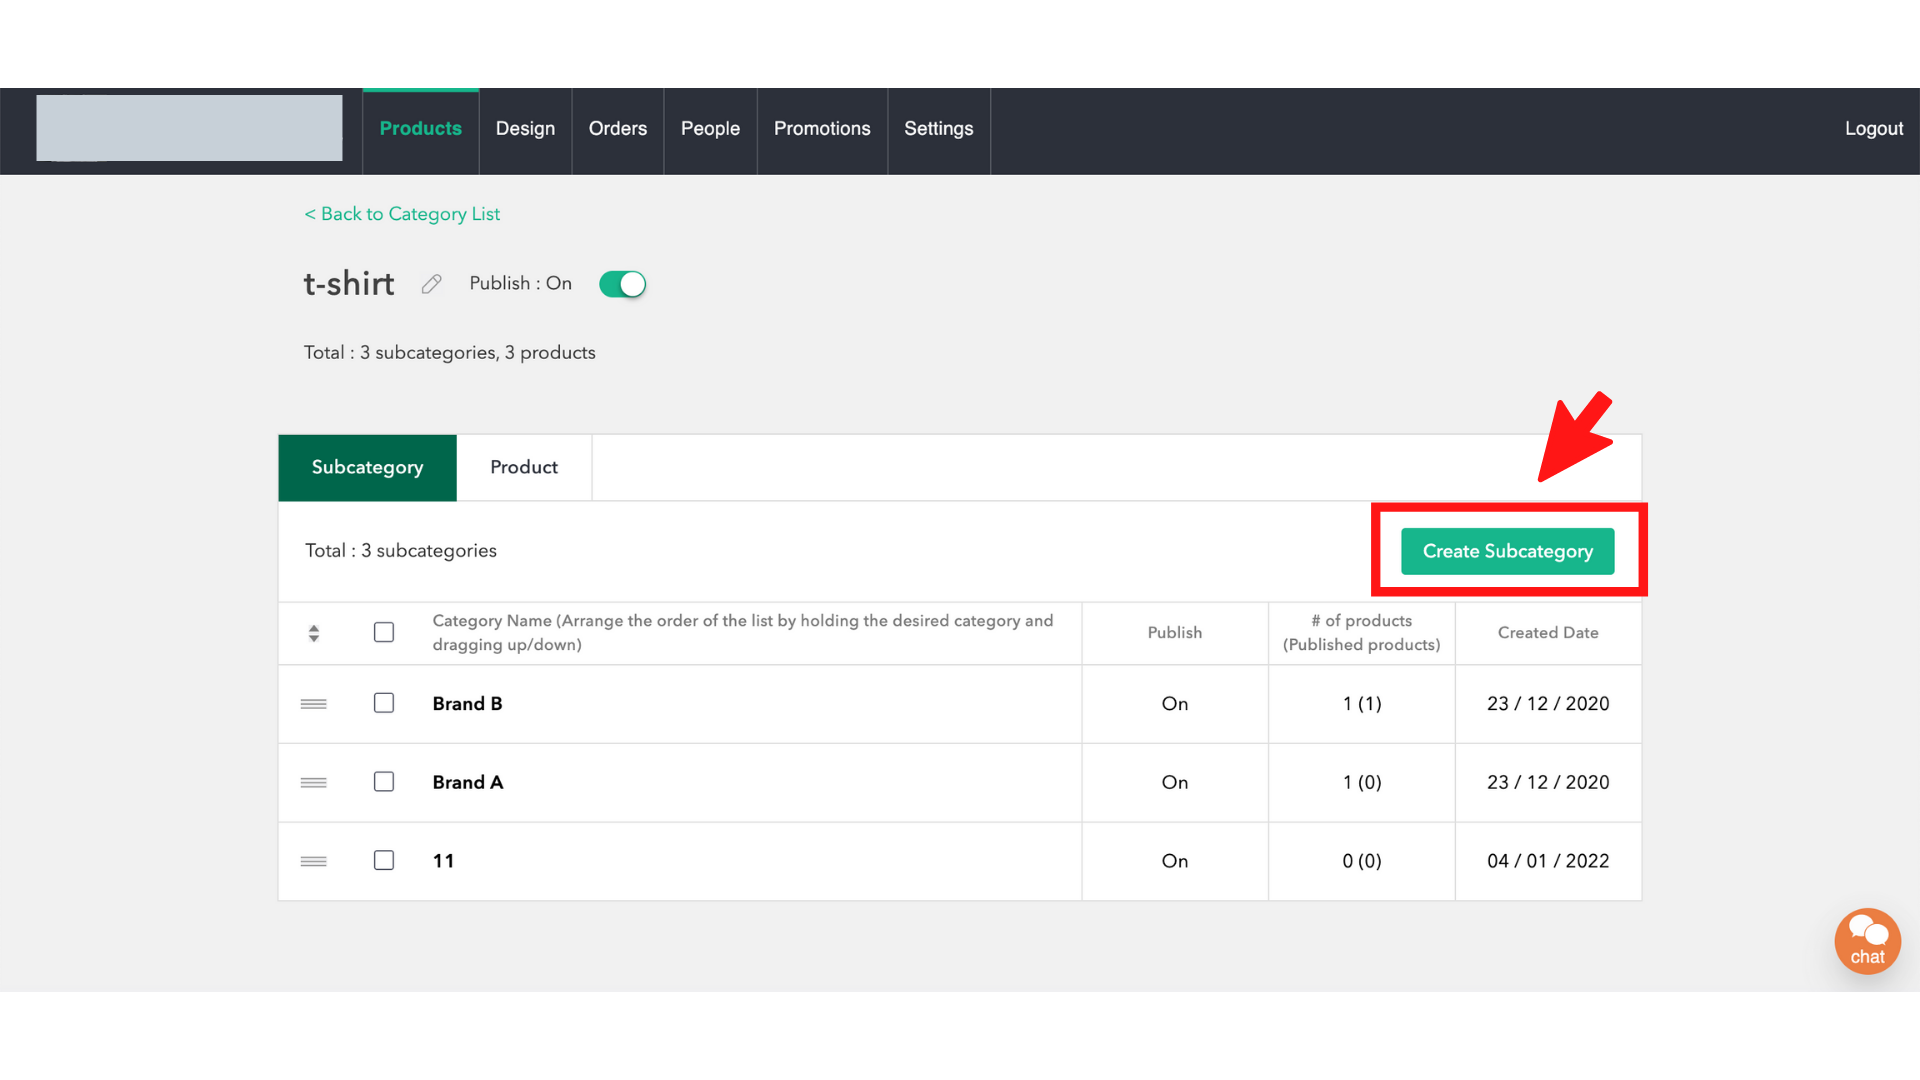
8. If you would like to add a subcategory under one of the categories, simply click on the intended category (in this case, “t-shirt”).
9. On the right-hand side, click “Create Subcategory”
10. Repeat the previous steps until you are satisfied with your product categories.
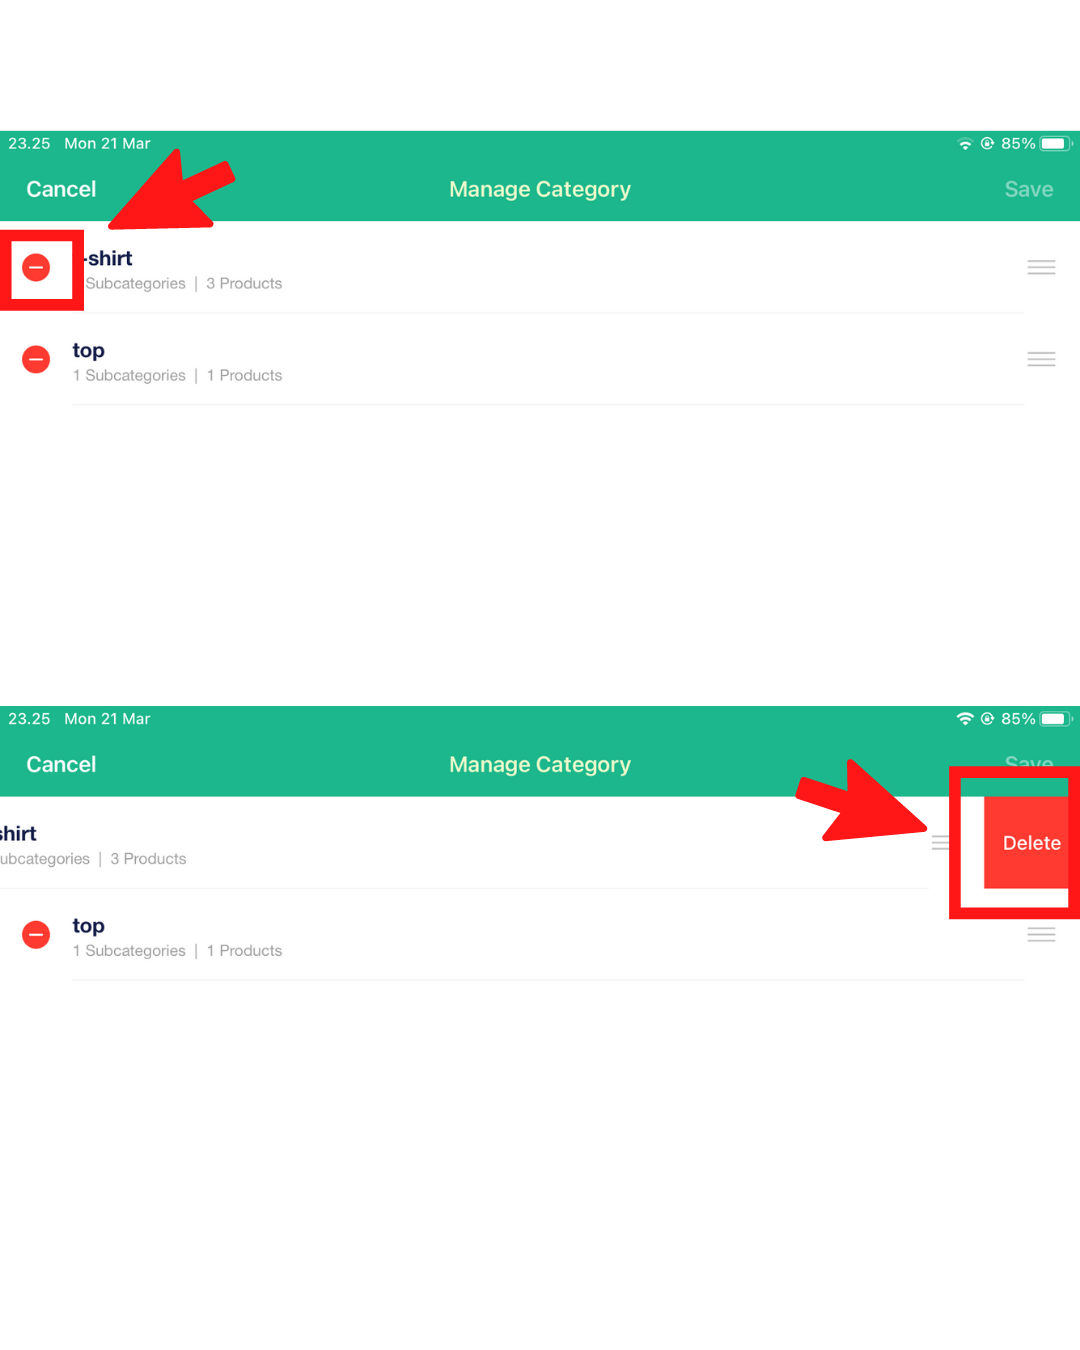
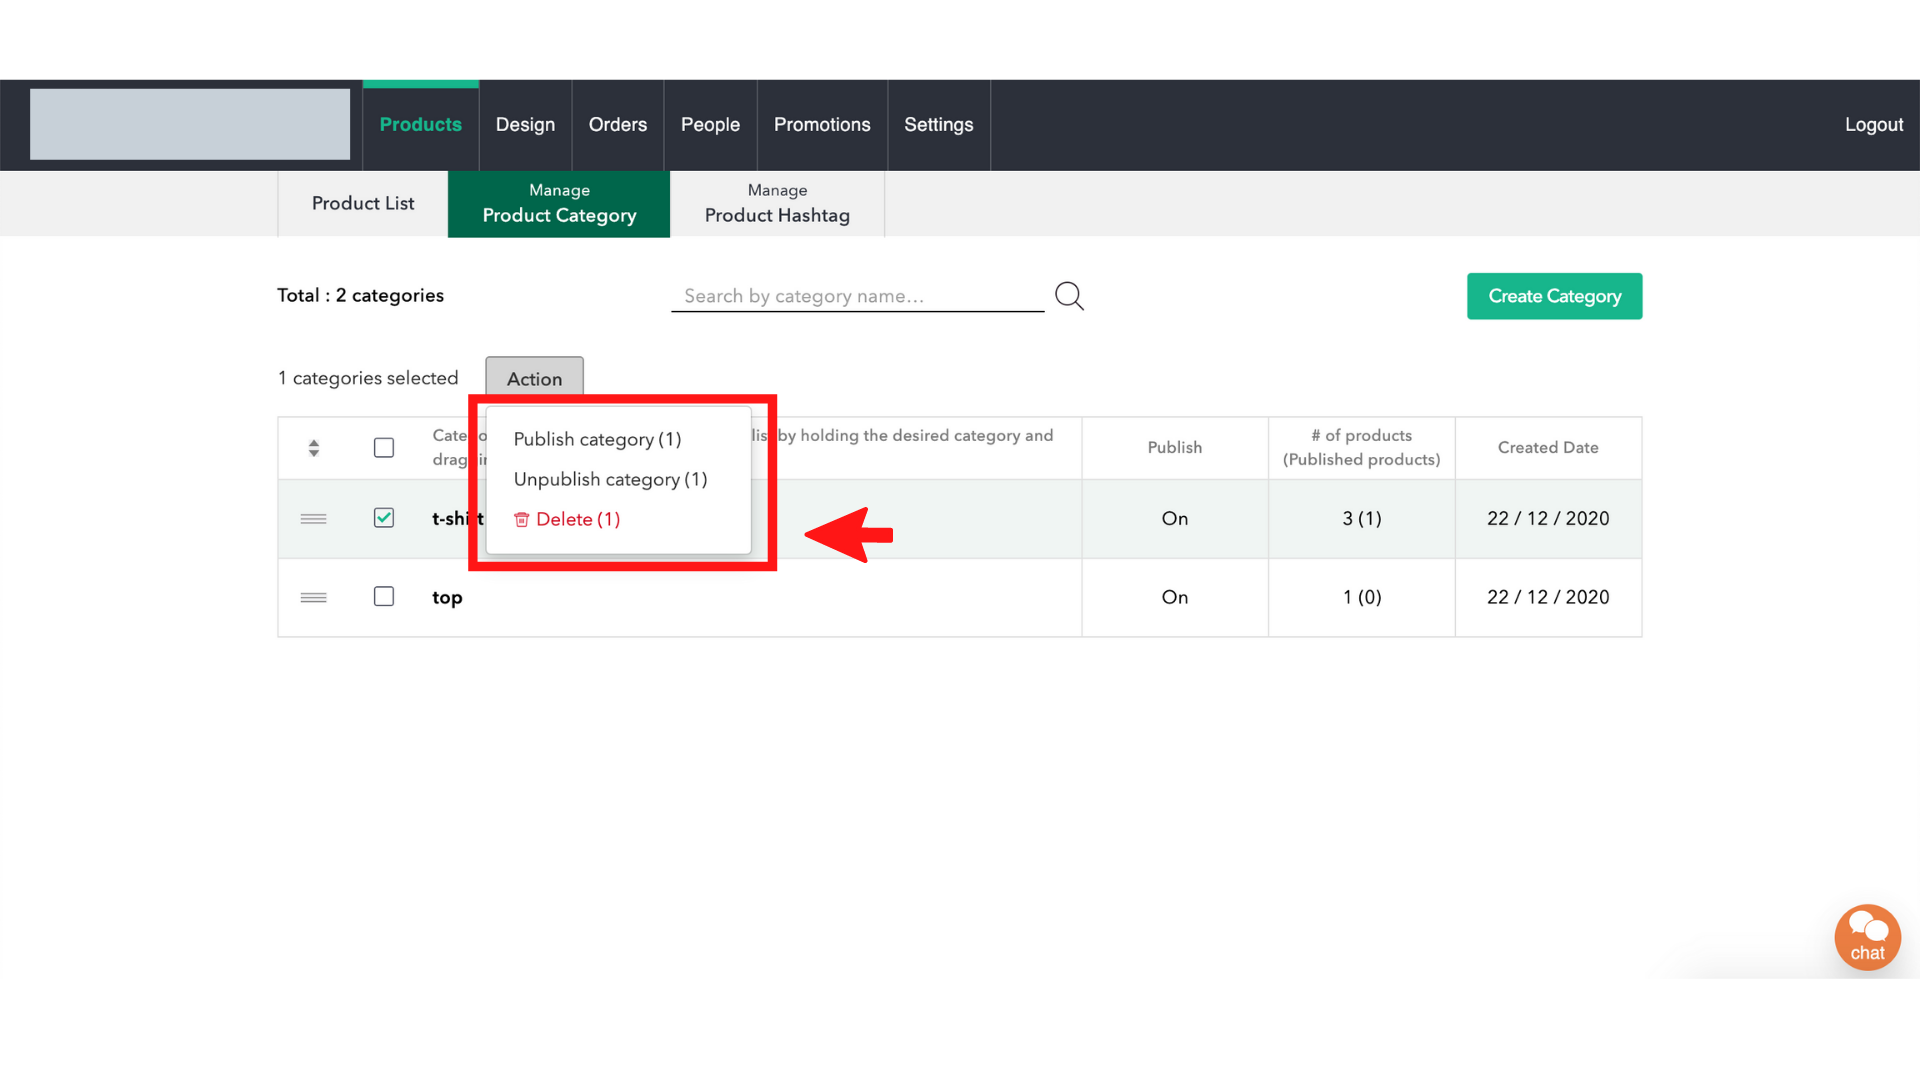
11. To delete a category, click on the checkbox beside each corresponding category, and click the “Action” button that should appear. You may then choose to publish, unpublish, or delete the category.

Tutorial for Boutir app
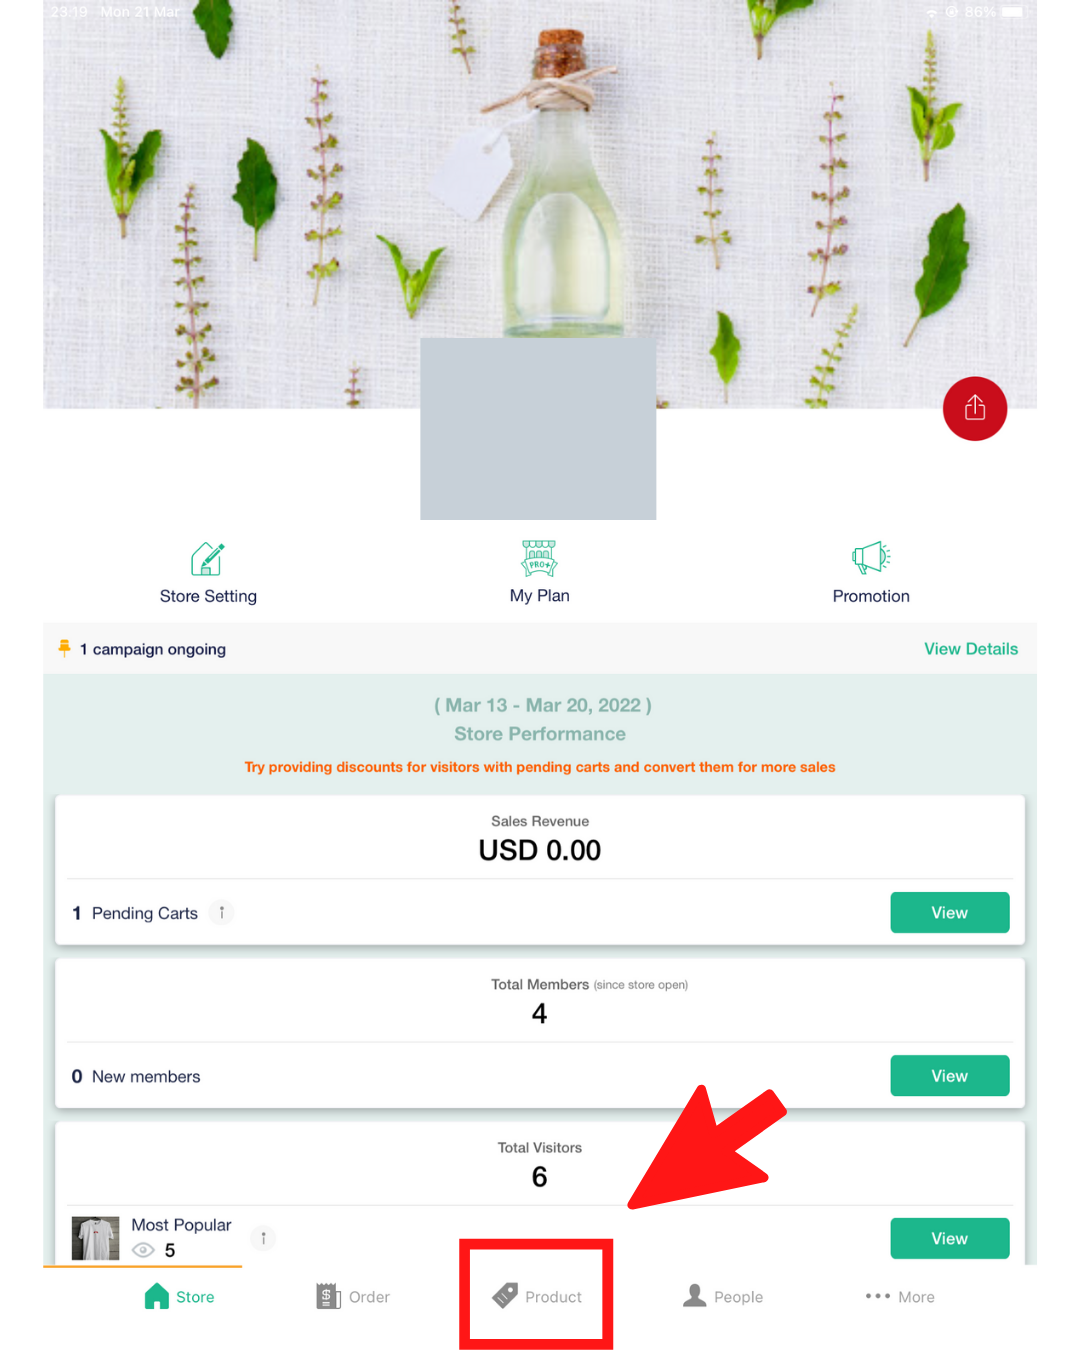
- Open the Boutir app and login
- Once you are logged in, go to the “Product” tab
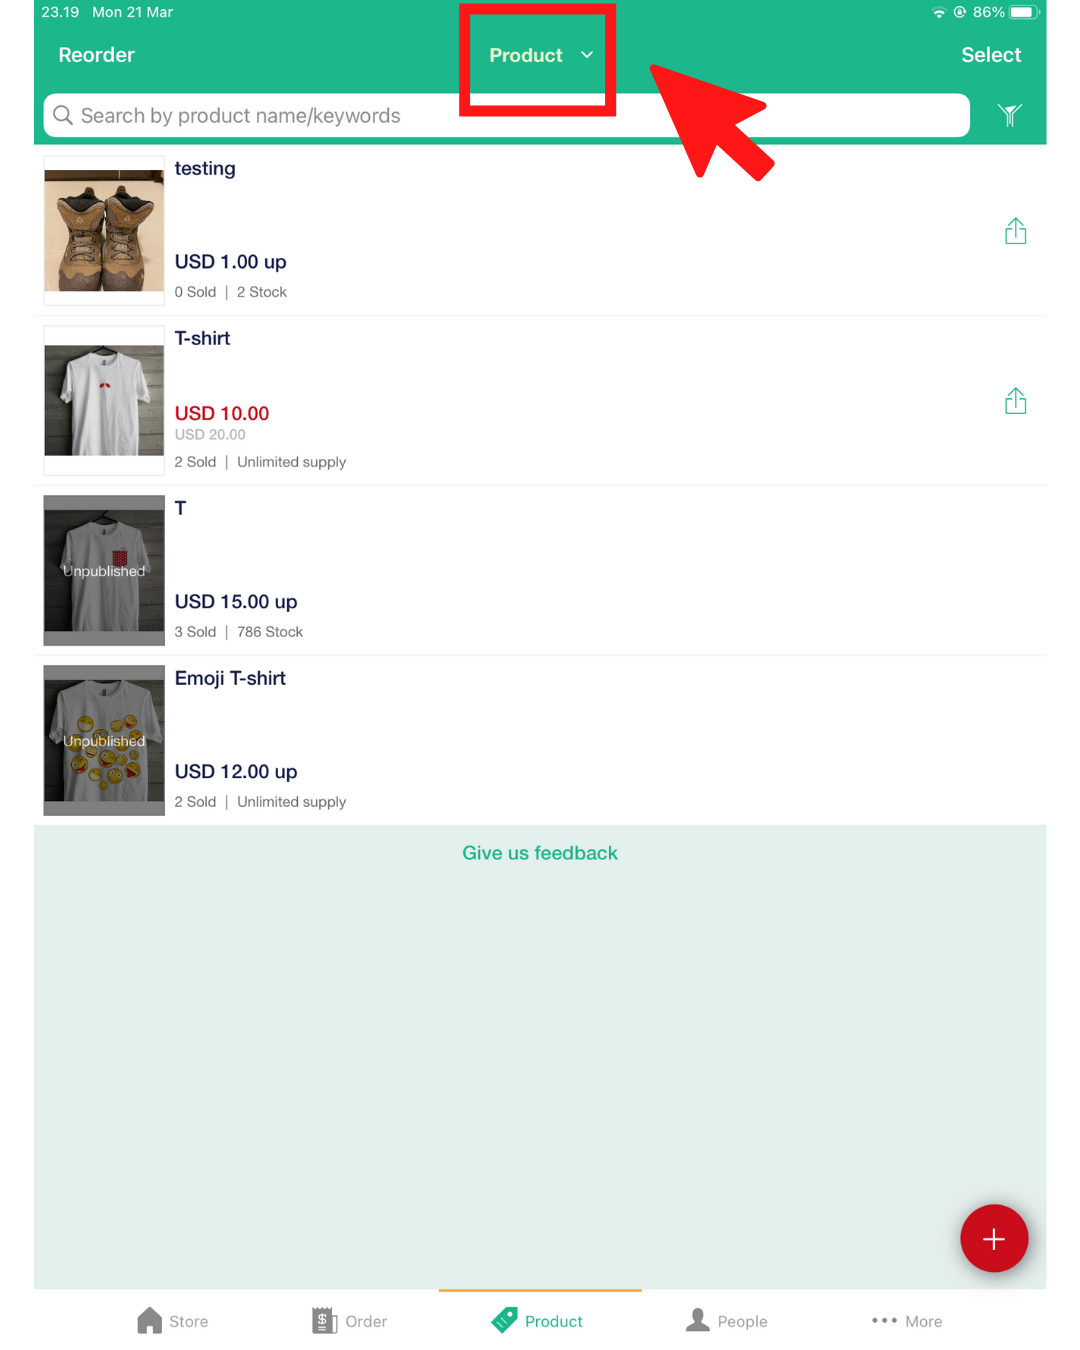
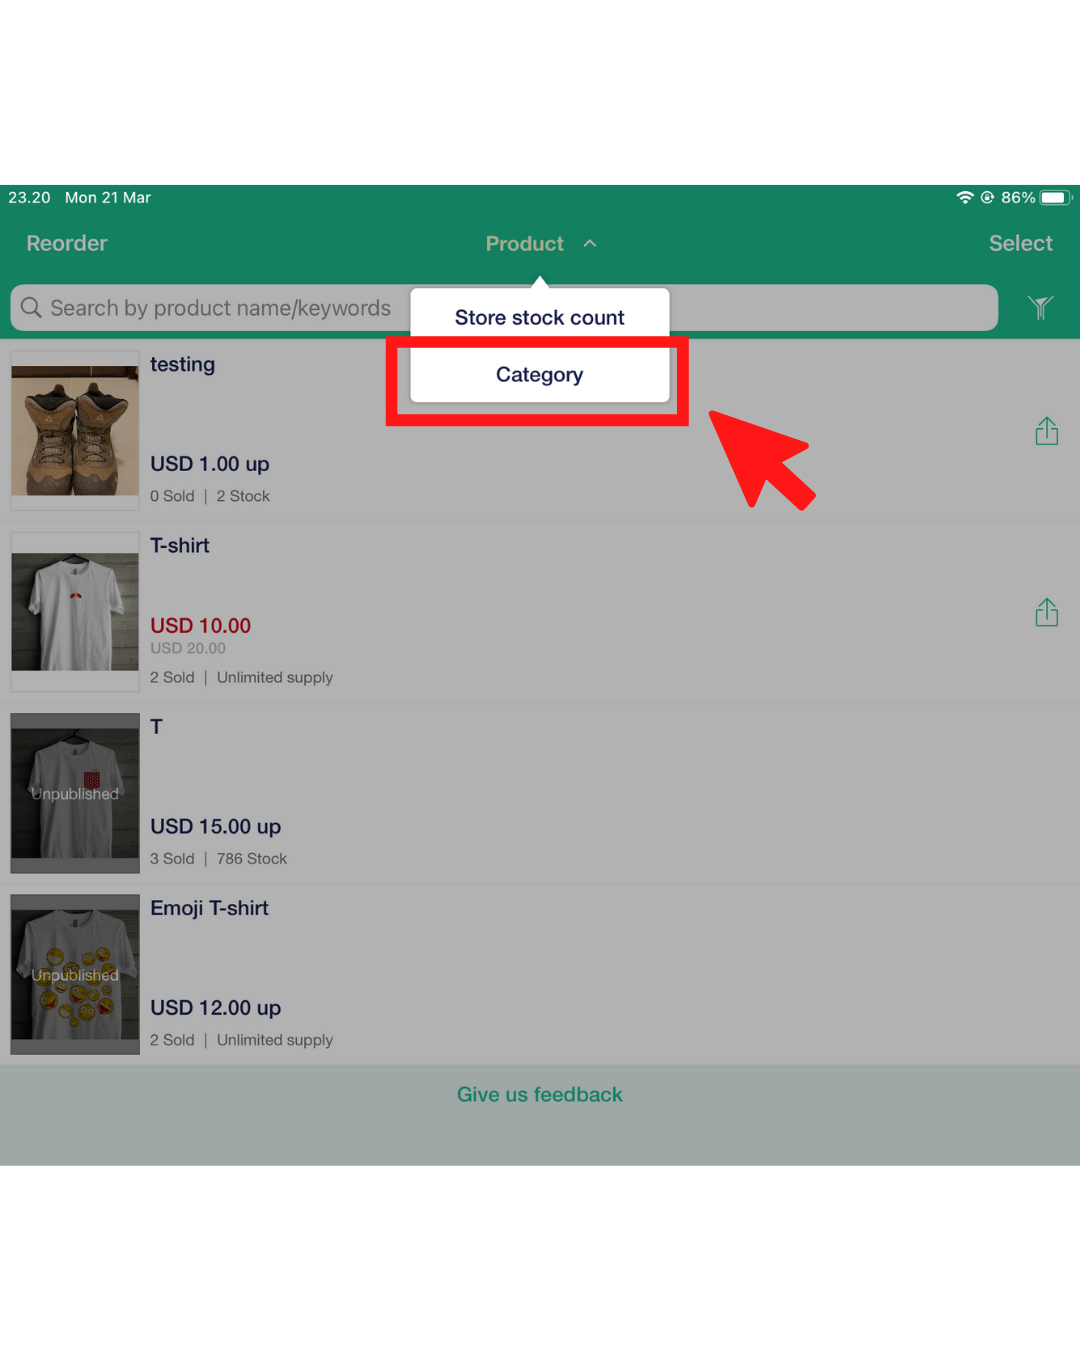
3. Click the word “Product” on the middle-top of the screen and click “Category”
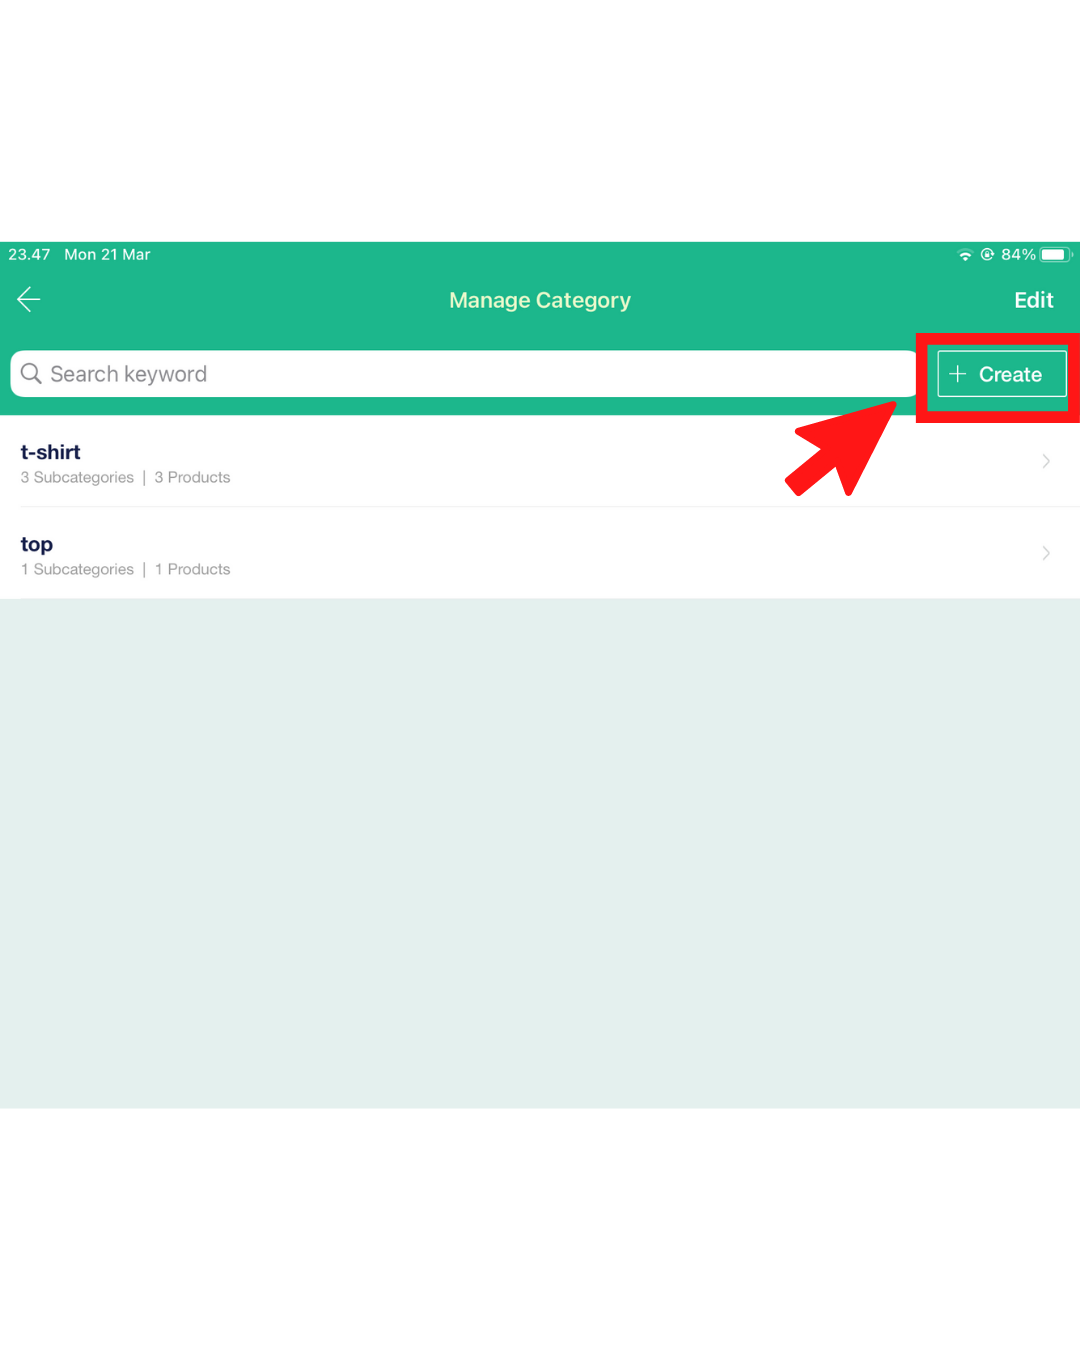
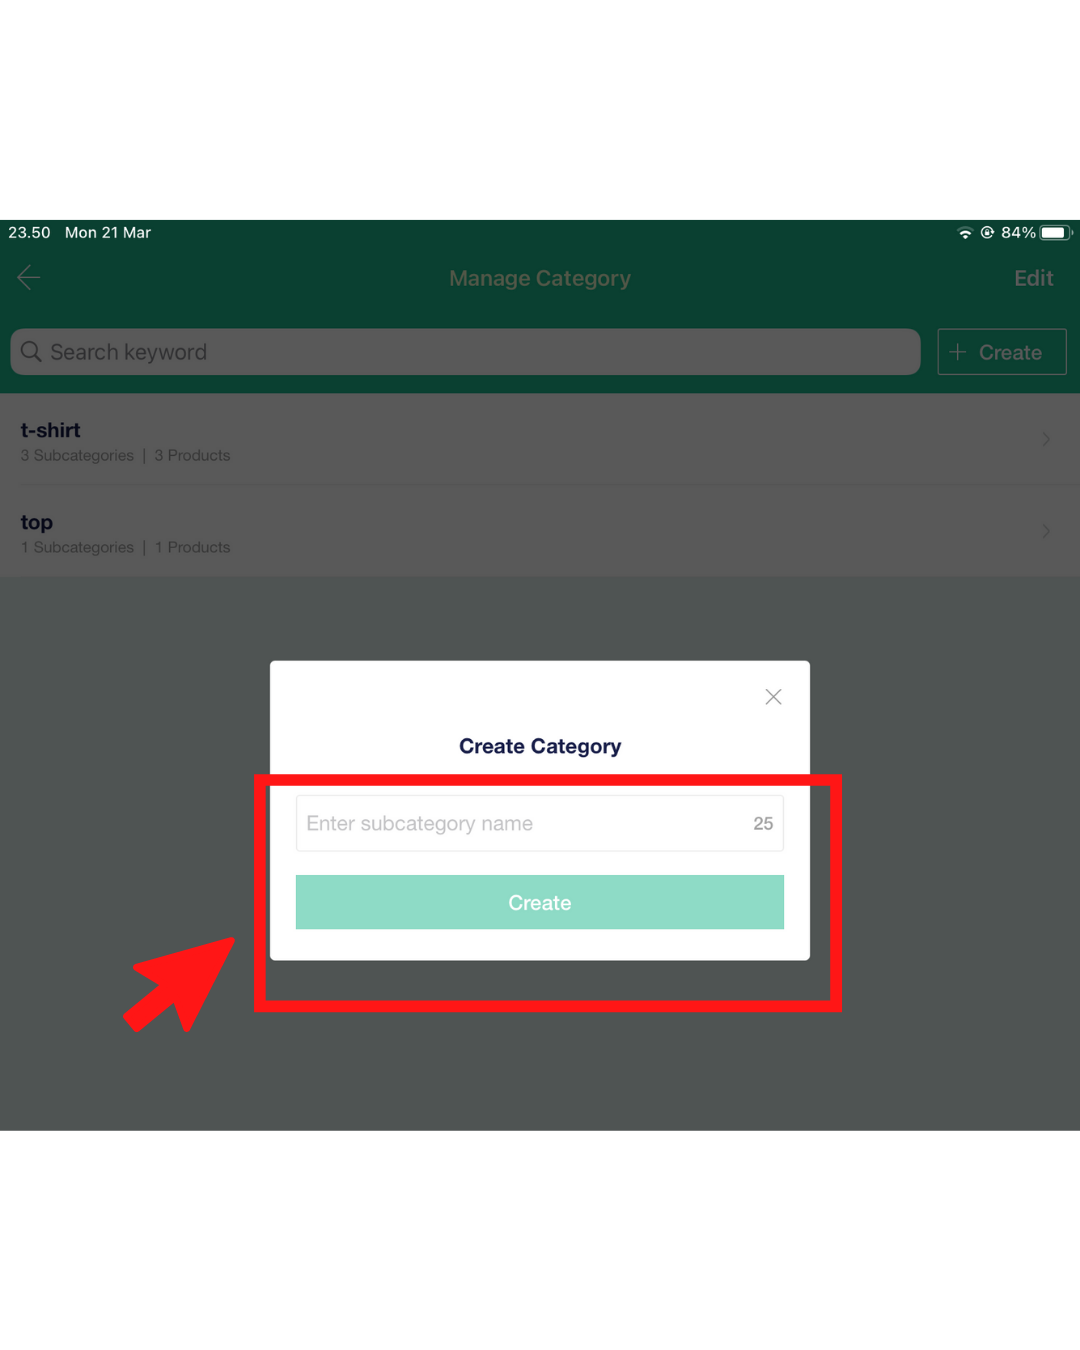
4. On the top right-hand side, click “Create”
5. Type in the name of the category and click “Create”
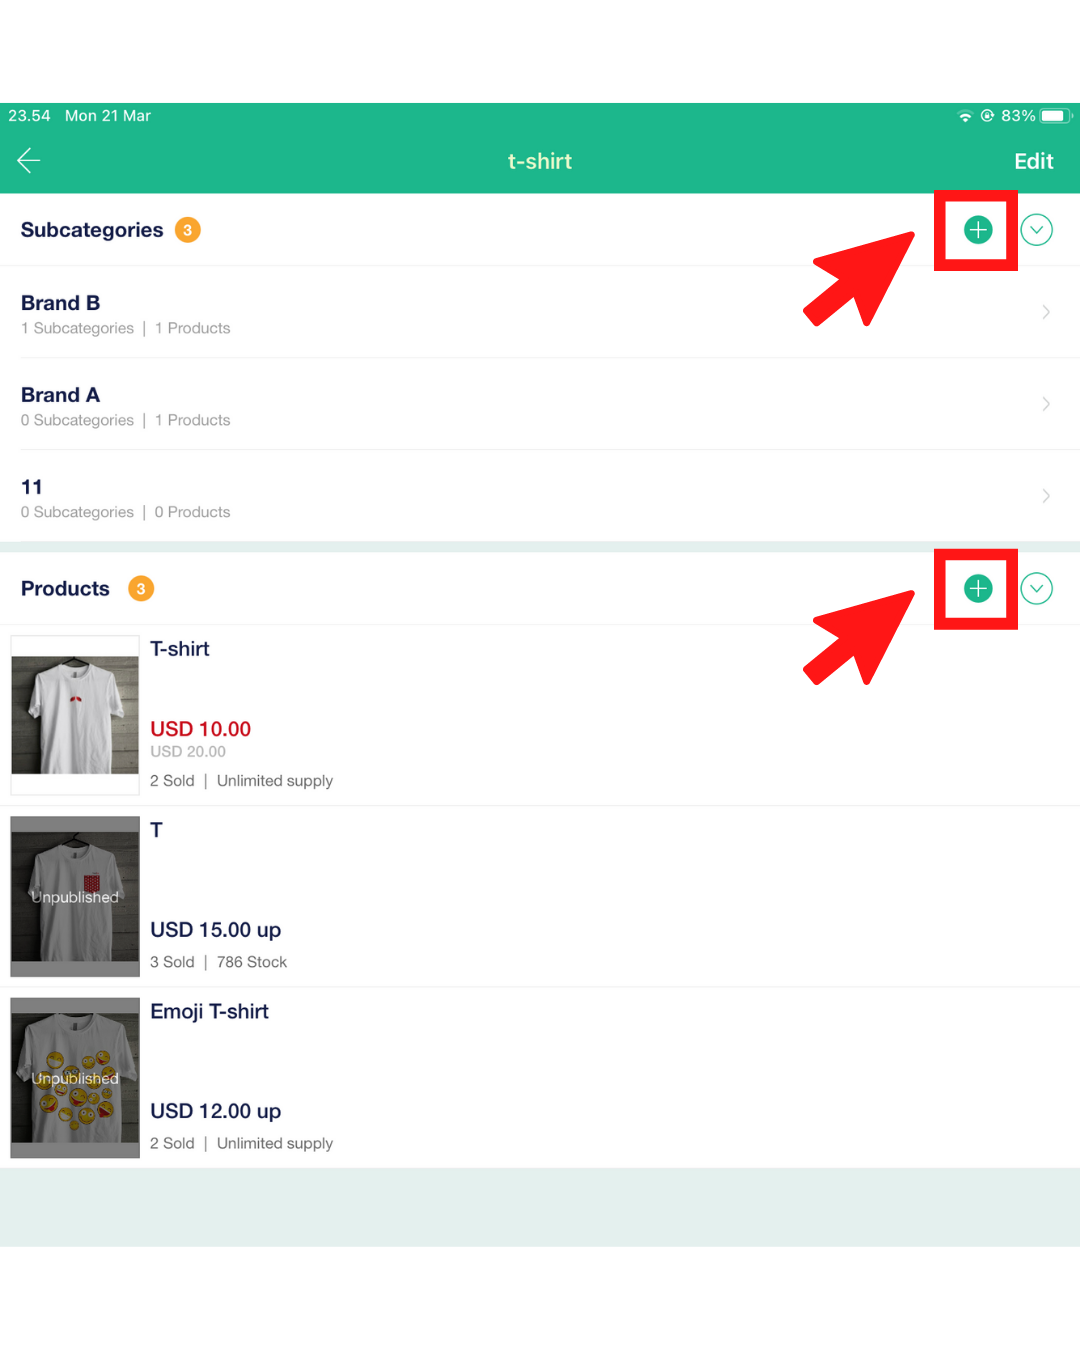
6. Once you have created it, click the intended category to create any subcategories or to add any products of your choice
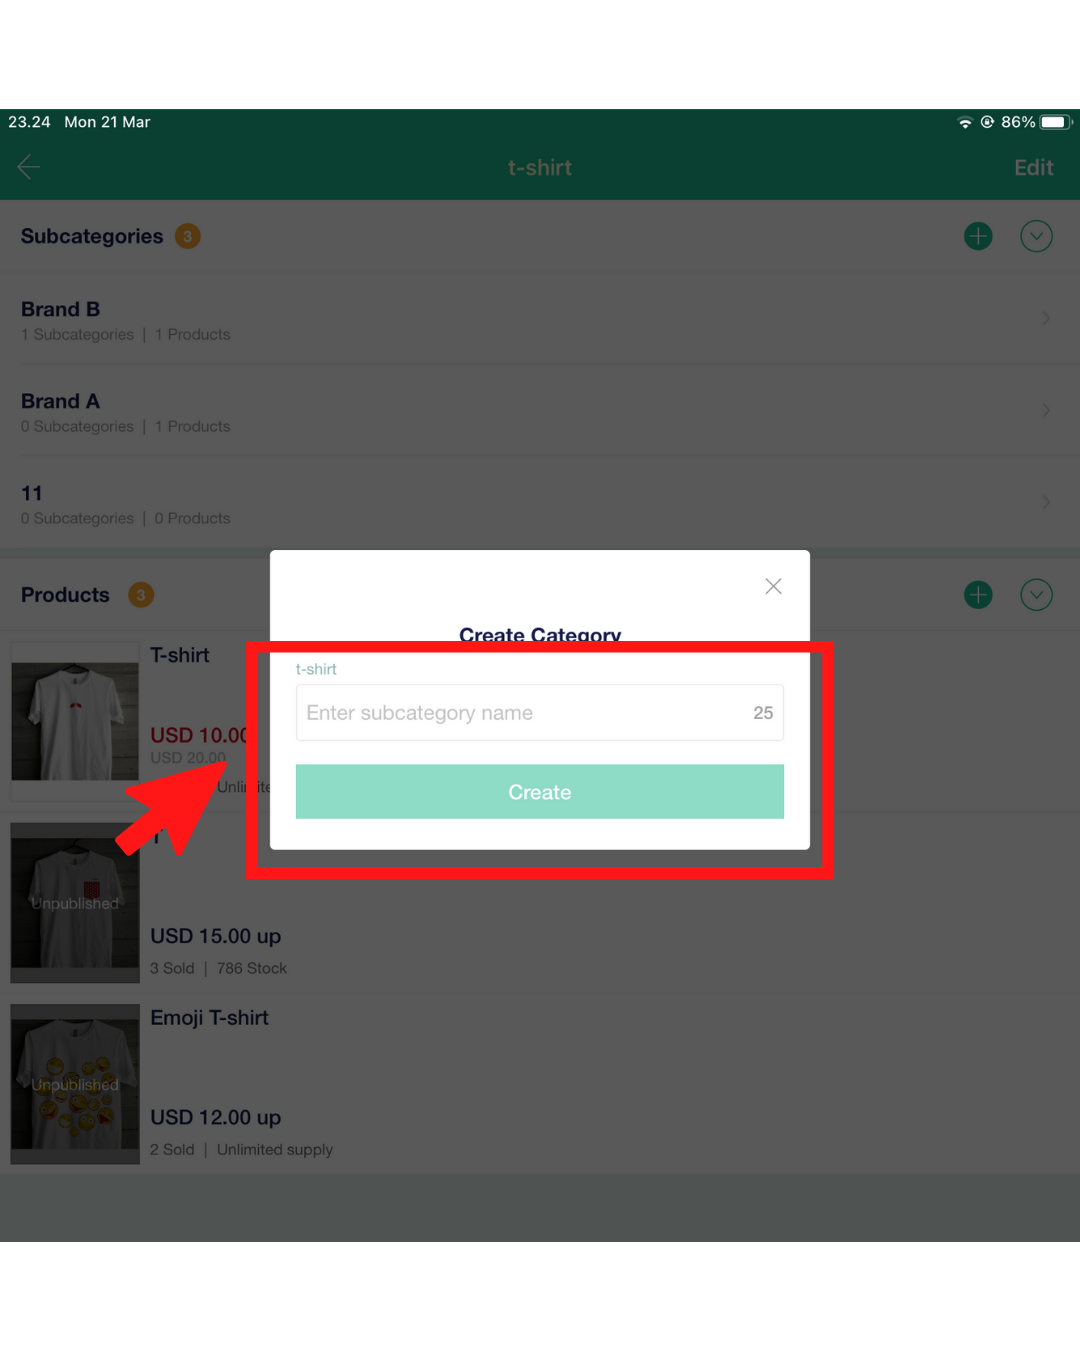
- Type in the sub-category name and click “Create”
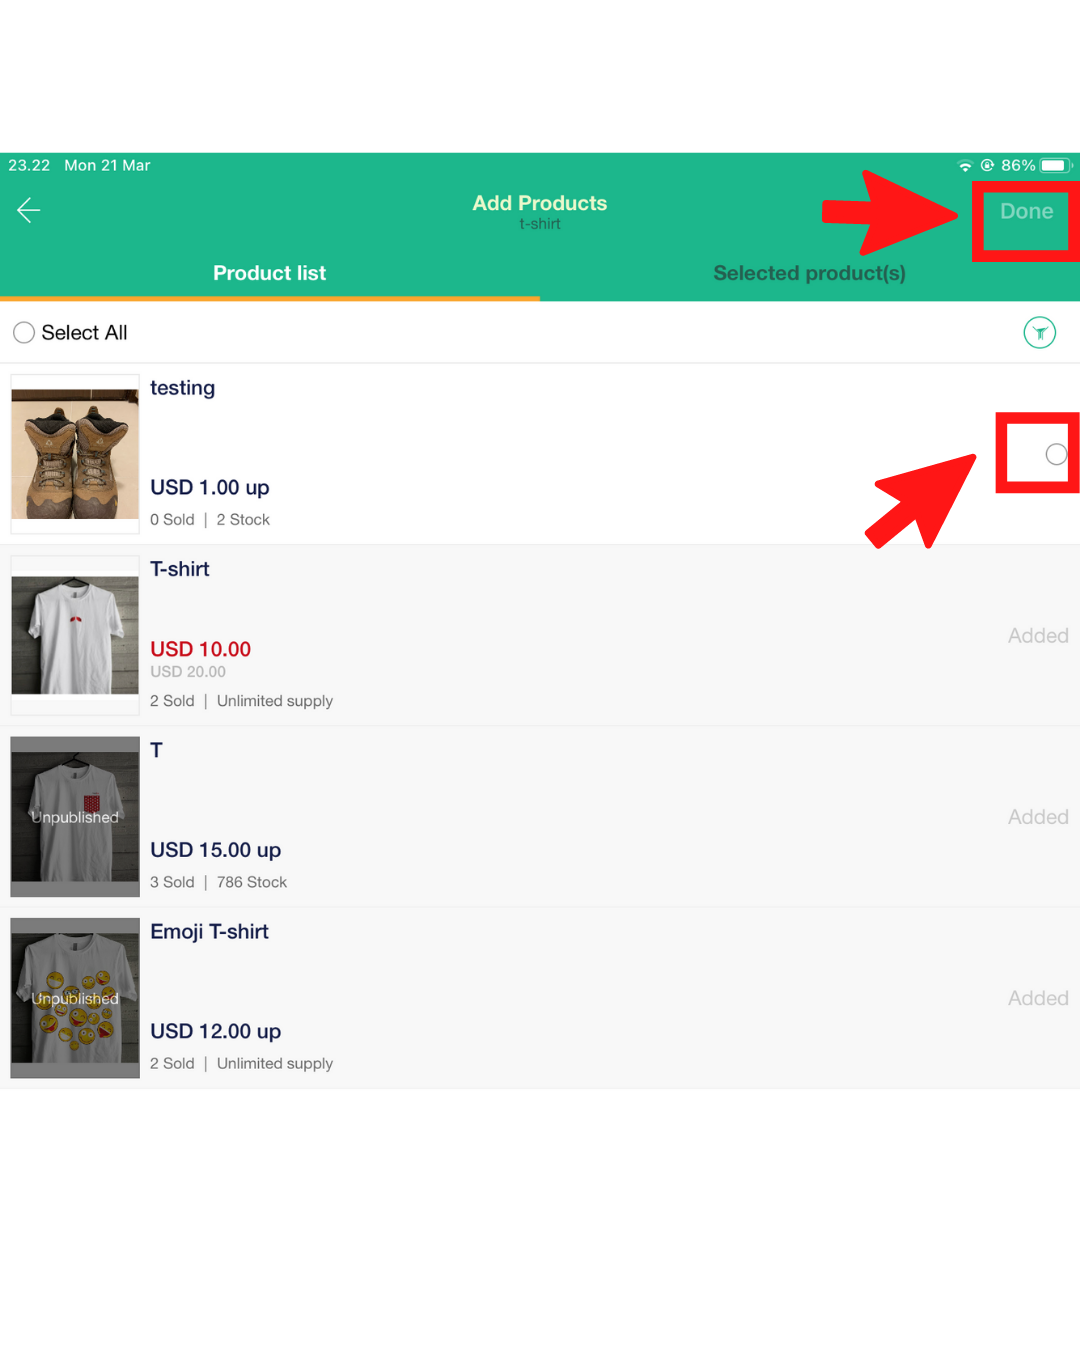
- Once you have selected the products, click “Done” to save.
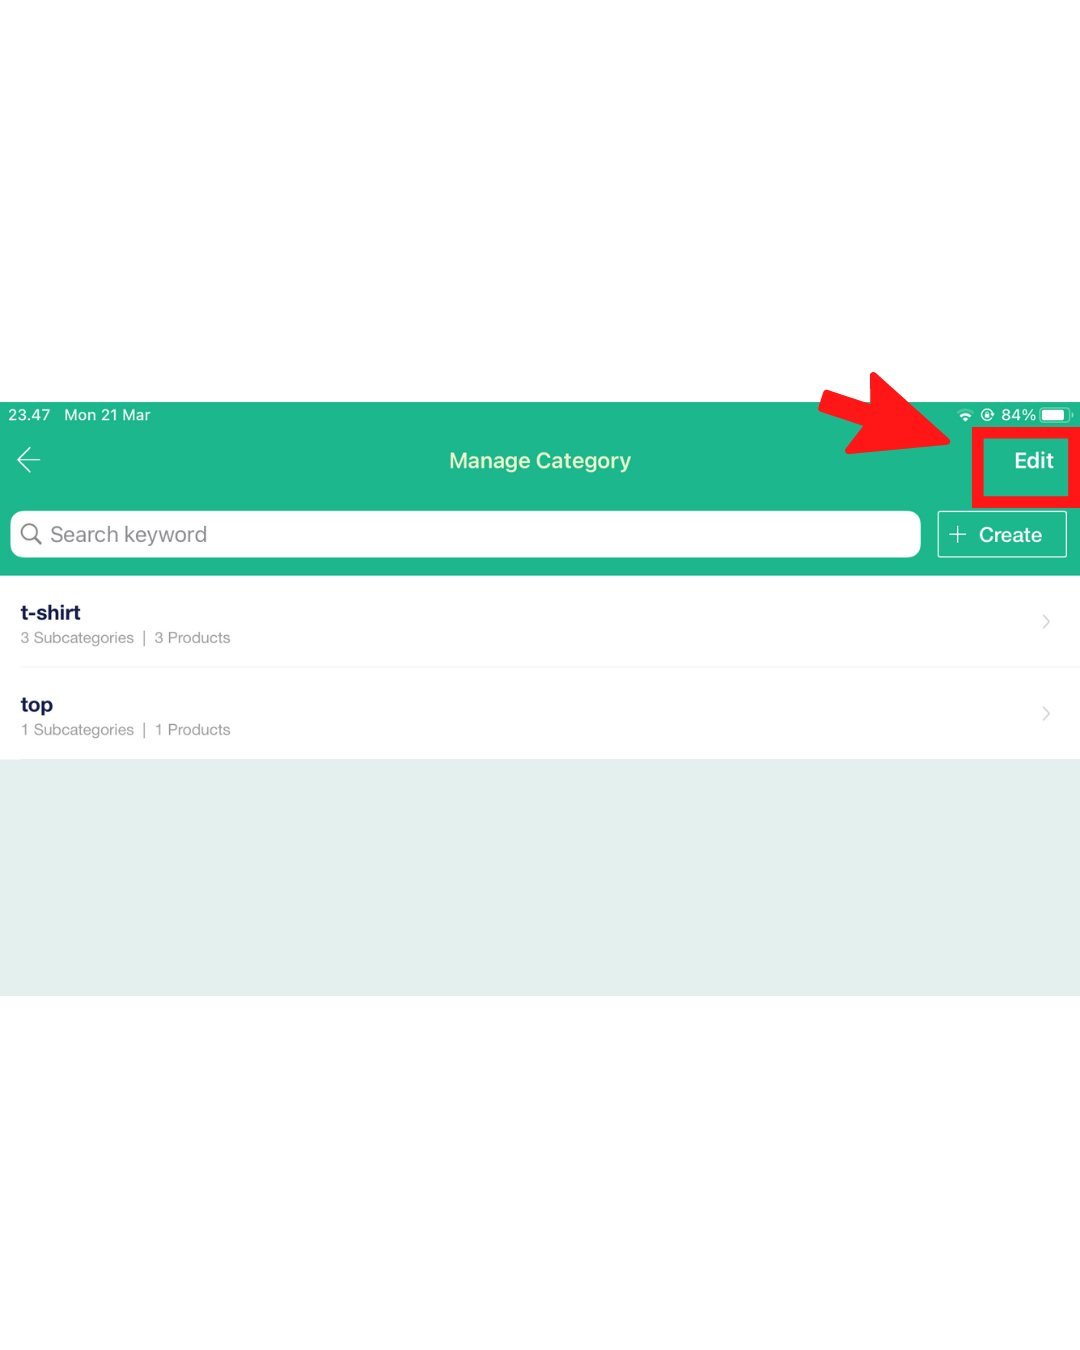
7. To delete any categories, go back to the main Category page and click “Edit” on the top-right
8. Click the red logo on the left of the corresponding category and click “Delete”